


The difference between a good long jumper and a great one often comes down to technical execution—not raw speed or explosive power alone. While athleticism matters, consistent distances exceeding 20 feet for high school athletes and 23+ feet for collegiate jumpers require mastering four distinct phases that transform horizontal velocity into maximum airborne distance. Elite jumpers share one common foundation: countless hours refining technique through deliberate, phase-specific practice.
Yet many athletes approach long jump training haphazardly, focusing solely on speed work while neglecting the technical precision separating conference champions from participants. They sprint fast but miss optimal takeoff positioning. They generate power but fail to maintain posture through flight. Without systematic technical development, talented athletes plateau well below their distance potential, wondering why their fastest approaches don’t translate to their longest jumps.
This comprehensive coaching guide breaks down long jump technique into four essential phases—approach run, takeoff, flight, and landing—providing the progressive framework high school and college athletes need to transform inconsistent jumping into reliable, competition-winning performances.
Effective long jump development requires understanding that each phase builds on the previous one, creating a continuous chain where technical breakdowns in any single phase limit overall distance regardless of speed or strength. Athletes who excel at long jump recognize that world-class technique consistently outperforms mediocre mechanics paired with superior athleticism.

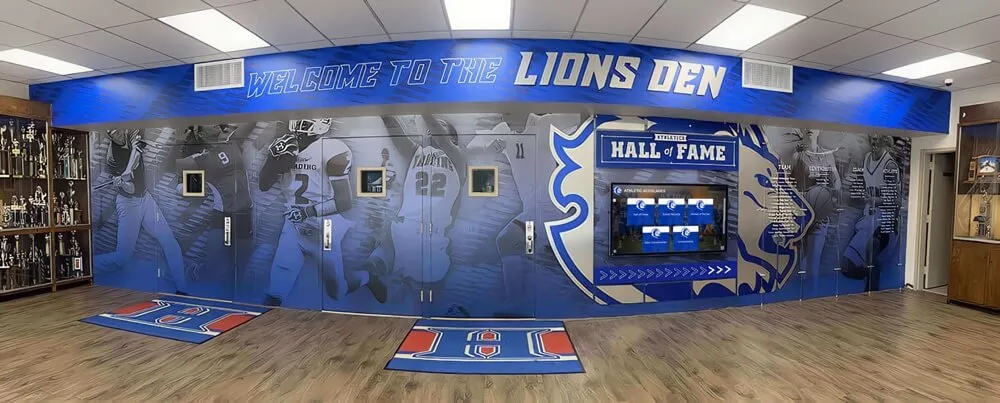
Modern track and field programs use digital platforms to celebrate personal records and technical improvements, motivating athletes to track measurable progress across competitive seasons
Understanding Long Jump Fundamentals
Before diving into phase-specific technique, every athlete must understand the biomechanical principles separating consistent 20+ foot jumpers from those struggling to reach 18 feet. Long jump success isn’t about copying another athlete’s style—it’s about applying universal principles while accommodating individual speed, strength, and body mechanics.
The Physics of Long Jump Distance
Long jump distance results from three measurable factors working in combination:
Horizontal Velocity at Takeoff
- Approach speed determines maximum distance potential
- Elite high school jumpers reach 8.5-9.5 meters/second at takeoff
- College-level athletes approach 9.5-10.5 meters/second
- Speed alone means nothing without proper conversion to vertical lift
- Every 0.1 m/s increase in controlled approach speed adds approximately 4-6 inches to distance
Vertical Velocity Generated at Takeoff
- Takeoff angle ideally falls between 18-22 degrees for optimal distance
- Too shallow (under 15 degrees): insufficient flight time limits distance
- Too steep (over 25 degrees): excessive height wastes horizontal momentum
- Elite jumpers generate 3.0-3.5 meters/second of vertical velocity
- Vertical lift extends flight time, allowing horizontal velocity to carry the athlete farther
Flight Time and Body Position
- Flight time typically ranges 0.65-0.90 seconds for competitive jumpers
- Body position during flight doesn’t add distance but prevents distance loss
- Proper flight technique maintains balance, preventing early rotation forward
- Landing mechanics maximize measured distance by extending feet beyond center of mass
- Poor flight position causes athletes to land 6-12 inches shorter than their trajectory allows
Approach Run Speed Development
The approach run generates the horizontal velocity that ultimately determines distance potential. Without controlled speed, no amount of technical refinement at takeoff produces elite distances.
Speed Benchmarks by Level:
- Beginner high school: 7.0-8.0 m/s approach speed
- Advanced high school: 8.5-9.5 m/s approach speed
- College women: 8.5-9.5 m/s approach speed
- College men: 9.5-10.5 m/s approach speed
- Elite/professional: 10.5-11.5 m/s approach speed
These velocities represent controlled speed at the board, not maximum sprint capability. Athletes who can run 10.5 m/s in a 100-meter dash might achieve only 9.0 m/s in their long jump approach due to the precision required for consistent board contact.

Track programs increasingly use [digital record boards](https://donorswall.com/blog/finding-school-sports-records/?utm_source=organic&utm_medium=seo-auto&utm_content=digitaltrophycase&utm_campaign=long-jump-technique&utm_term=seo) to display long jump records, creating motivation for athletes pursuing school and conference standards
The relationship between approach speed and jump distance isn’t linear—each incremental speed increase becomes progressively harder to convert into additional distance. An athlete jumping 18 feet with an 8.0 m/s approach won’t automatically reach 22 feet with a 9.0 m/s approach unless takeoff mechanics improve proportionally.
Phase 1: Approach Run Long Jump Technique
The approach run establishes the foundation for everything that follows. Inconsistent approaches produce inconsistent distances regardless of perfect takeoff mechanics.
Establishing Optimal Approach Length
Approach length must balance maximum controllable speed with consistent accuracy hitting the takeoff board.
Approach Distance Guidelines:
- Beginner athletes (first year): 12-14 strides (approximately 60-70 feet)
- Intermediate athletes (2-3 years experience): 14-16 strides (approximately 70-85 feet)
- Advanced high school: 16-18 strides (approximately 85-100 feet)
- College and elite: 18-22 strides (approximately 100-130 feet)
Longer approaches allow more acceleration distance, but only if athletes maintain control and hit consistent board contact. A 16-stride approach producing 95% accuracy outperforms a 20-stride approach with 60% accuracy—scratches and adjusted steps kill distance more than slightly reduced speed.
Finding Your Optimal Approach Distance:
- Establish your starting mark: Begin from a standing position at your estimated starting point
- Execute a controlled acceleration run: Run through the takeoff board area without jumping, building to 90-95% of maximum controllable speed
- Mark your board contact point: Note where your preferred takeoff foot naturally falls relative to the board
- Adjust starting position: Move your start mark forward or backward to align board contact
- Validate through repetition: Complete 8-10 approach runs, checking for consistent board contact within 4-6 inches
- Lock in your marks: Once validated, mark your starting position with tape or paint for every practice and competition
Many programs use interactive recognition displays tracking approach consistency metrics alongside distance results, helping athletes understand the correlation between technical precision and performance outcomes.
Acceleration Pattern and Rhythm
The approach run isn’t a full sprint—it’s a controlled acceleration building to optimal takeoff velocity while maintaining precise rhythm and board accuracy.
Three-Phase Acceleration Model:
Initial Drive Phase (First 4-6 Strides)
- Powerful, driving strides building momentum from standing start
- Forward body lean approximately 45 degrees from vertical
- Aggressive arm drive supporting acceleration
- Stride length increases with each step
- Focus on explosive push-off, not overstriding
- Eyes down, focused on running mechanics
Transition Phase (Middle 6-10 Strides)
- Gradual upright posture transition from drive position
- Continued acceleration but smoothing out rhythm
- Stride length reaches near-maximum but remains controlled
- Arms transition to relaxed, rhythmic swing
- Begin visual acquisition of takeoff zone
- Speed approaching 85-90% of approach maximum
Preparation Phase (Final 4-6 Strides)
- Fully upright sprinting posture achieved
- Maximum controllable velocity maintained (not accelerating)
- Consistent, rhythmic stride pattern established
- Final stride adjustments for precise board contact
- Eyes locked on takeoff board for visual feedback
- Mental preparation for explosive takeoff transition

Schools showcase long jump achievements through modern recognition systems, displaying personal records, conference standings, and historical program benchmarks
Common Approach Run Mistakes:
Mistake: Reaching maximum sprint speed too early in the approach Consequence: Fatigue and deceleration in final strides, reducing takeoff velocity Correction: Build speed gradually, reaching peak velocity in final 3-4 strides before takeoff
Mistake: Chopping stride length in final steps to hit the board Consequence: Destroyed rhythm, reduced speed, poor takeoff mechanics Correction: Adjust starting position rather than modifying final stride pattern
Mistake: Looking down at the board throughout final strides
Consequence: Forward body lean, compromised sprint mechanics, reduced takeoff effectiveness
Correction: Acquire board visually in transition phase, then maintain upright posture through final strides
Developing Consistent Check Marks
Check marks provide visual feedback during the approach, allowing athletes to confirm rhythm and adjust stride pattern before reaching critical final strides.
Standard Check Mark System:
- Primary check mark: 4-6 strides before takeoff (approximately 20-30 feet from board)
- Secondary check mark: Midpoint of approach (approximately 40-60 feet from board)
- Starting mark: Clearly defined starting position validated through repetition
Athletes passing check marks on the correct foot within 1-2 inches of the mark position demonstrate consistent approach mechanics. Significant variance at check marks indicates rhythm problems requiring correction before reaching the board.
Many successful programs integrate student athlete achievement tracking systems documenting technical metrics like check mark consistency alongside competition results, helping athletes recognize the correlation between practice precision and meet performance.
Phase 2: Takeoff Technique
Takeoff converts horizontal approach velocity into the vertical lift and continued horizontal momentum necessary for maximum distance. This .12-.15 second phase determines whether 9.0 m/s approach speed produces an 18-foot jump or a 21-foot jump.
The Penultimate Step
The second-to-last stride before takeoff—the penultimate step—sets up optimal body position and creates the mechanical advantage for explosive vertical conversion.
Penultimate Step Characteristics:
- Slightly longer than normal approach strides (6-12 inches longer)
- Lower body position with increased knee flexion (approximately 140-150 degree knee angle)
- Flatter foot plant compared to sprinting ball-of-foot contact
- Aggressive backward arm swing preparing for explosive forward drive
- Sets center of mass slightly behind landing foot, creating stored elastic energy
- Creates approximately 2-4 inch lowering of body’s center of mass
The penultimate step functions like a loading phase, storing elastic energy in tendons and muscles while positioning the body for explosive extension during the final takeoff step.
Coaching the Penultimate Step:
- Video analysis from side angle reveals proper knee flexion and center of mass lowering
- Athletes should feel “sitting down” slightly during this stride
- Avoid excessive lowering (over 4-5 inches), which slows horizontal velocity
- Practice penultimate step in isolation through long jump drills emphasizing this specific phase
- Use resistance band exercises developing eccentric strength necessary for proper loading
Board Contact and Takeoff Mechanics
The takeoff foot contacts the board at the end of a slightly shorter final stride, creating maximum vertical impulse while maintaining horizontal velocity.
Optimal Takeoff Position:
- Foot contact: Whole foot contact (heel-ball) or flat-footed, not sprinting ball-of-foot contact
- Foot placement: Directly under center of mass or slightly ahead (no more than 6 inches)
- Knee angle: Approximately 155-165 degrees at initial contact
- Hip position: Tall, extended hip position maintaining upright torso
- Torso angle: Vertical to slight backward lean (0-5 degrees behind vertical)
- Head position: Neutral, eyes forward and slightly upward
- Arms: Driving powerfully upward and forward in coordinated motion
Powerful Takeoff Extension Sequence:
- Initial Contact (.00-.04 seconds): Takeoff foot plants with whole-foot contact, weight transfers onto leg
- Loading Phase (.04-.08 seconds): Knee flexes slightly (approximately 10-15 degrees additional flexion), storing final elastic energy
- Extension Phase (.08-.12 seconds): Explosive triple extension (ankle, knee, hip) driving body upward
- Free Leg Drive: Non-takeoff leg drives upward with aggressive knee lift to chest level
- Arm Coordination: Both arms drive upward powerfully, reaching overhead by the end of ground contact
- Final Push (.12-.15 seconds): Ankle plantarflexion provides final explosive push, propelling athlete airborne
The takeoff leg must withstand forces of 4-6 times body weight during this brief ground contact. Insufficient strength results in collapse or insufficient extension, dramatically reducing vertical lift and overall distance.
Takeoff Force Development:
- Single-leg box jumps: 3 sets of 6-8 repetitions at 18-30 inch box heights
- Bounding exercises: 3-5 sets of 6-10 bounds emphasizing maximum vertical lift each contact
- Depth jumps: 3 sets of 5 repetitions from 12-20 inch boxes focusing on reactive strength
- Weighted jump squats: 3 sets of 5 repetitions at 30-40% of back squat maximum
- Single-leg Romanian deadlifts: 3 sets of 8-10 repetitions developing eccentric hamstring strength

Digital platforms enable athletes to explore [hall of fame achievements](https://digitalrecordboard.com/blog/hall-of-fame/?utm_source=organic&utm_medium=seo-auto&utm_content=digitaltrophycase&utm_campaign=long-jump-technique&utm_term=seo) including long jump records and technical benchmarks from program history
Common Takeoff Errors:
Error: Reaching for the board with extended leg Result: Creates braking force, reduces horizontal velocity, prevents effective vertical conversion Fix: Focus on maintaining approach rhythm, allowing natural foot placement under center of mass
Error: Ball-of-foot takeoff contact (sprinting mechanics)
Result: Insufficient ground contact time, reduced force application, lower vertical lift
Fix: Practice whole-foot or flat-footed contact through long jump drills emphasizing proper board mechanics
Error: Forward torso lean at takeoff Result: Horizontal orientation prevents vertical conversion, excessive forward rotation during flight Fix: Maintain upright posture through final approach strides, engage core to prevent forward collapse
Phase 3: Flight Technique and Body Position
Flight technique doesn’t add distance—physics determines trajectory the moment you leave the ground. However, proper flight technique prevents distance loss by maintaining balance and optimizing landing position.
Three Flight Technique Styles
Long jumpers use three primary flight techniques, each with distinct characteristics and coaching considerations:
Hang Technique
- Description: Athlete extends body vertically with arms overhead, creating elongated position during peak flight
- Body position: Upright torso, both legs extended downward, arms reaching upward
- Timing: Achieved at peak of trajectory, held through descent
- Advantages: Simple to learn, effective for preventing forward rotation, good for beginner and intermediate athletes
- Disadvantages: Doesn’t maximize landing distance as effectively as other styles
- Best for: High school athletes developing fundamental technique, athletes with limited flight time
Sail Technique
- Description: Athlete maintains running position in air, cycling legs in walking or running motion
- Body position: Upright torso, legs alternating in running motion, arms coordinated with leg action
- Timing: Initiated immediately after takeoff, continued through entire flight
- Advantages: Natural continuation of running motion, maintains balance, effective for athletes with moderate flight time
- Disadvantages: Requires good coordination, less effective for maximum distance than hitch-kick
- Best for: Athletes transitioning from beginner to advanced technique, those with moderate approach speed
Hitch-Kick Technique
- Description: Athlete performs continuous cycling motion with legs during flight, similar to running in air
- Body position: Dynamic leg cycling (1.5, 2.5, or 3.5 steps), coordinated arm action, forward body momentum
- Timing: Aggressive cycling begins immediately after takeoff, continues through descent until landing preparation
- Advantages: Best for preventing forward rotation, allows maximum landing distance extension, used by elite jumpers
- Disadvantages: Requires longer flight time, demands significant coordination and practice
- Best for: Advanced high school and college athletes with 9.0+ m/s approach speed and .75+ second flight time
Executing the Hitch-Kick (Advanced Technique)
For athletes ready to maximize distance potential, the hitch-kick provides the most effective flight technique:
Takeoff to First Step (.00-.25 seconds):
- Takeoff leg remains extended behind body from ground push-off
- Free leg (non-takeoff leg) drives to maximum height, thigh parallel to ground
- Arms reach overhead from takeoff drive position
- Begin backward rotation of elevated free leg
First to Second Step (.25-.50 seconds):
- Free leg cycles backward and downward in running motion
- Takeoff leg cycles forward and upward, knee driving toward chest
- Arms coordinate with leg action (opposite arm/leg pattern)
- Torso remains upright, preventing forward rotation
Second to Landing Preparation (.50-.75 seconds):
- Continue cycling motion, completing 1.5, 2.5, or 3.5 total steps depending on flight time
- Both legs begin extending forward toward landing as trajectory descends
- Arms sweep backward then forward to assist forward reach
- Torso prepares for forward lean into landing position

Modern recognition systems showcase athletic achievements including long jump personal records, creating visible milestones that motivate consistent technical development
Long Jump Drills for Flight Technique Development:
Drill: Pop-ups from short approach Purpose: Practice flight technique without full approach speed pressure Execution: 6-8 stride approach, focus entirely on flight position from takeoff through landing
Drill: Sand pit hitch-kick practice
Purpose: Develop cycling coordination in safe environment
Execution: Jump from elevated surface into sand pit, emphasizing complete cycling motion before landing
Drill: Flight position holds on high bar Purpose: Build core strength and body awareness for maintaining flight position Execution: Hang from high bar, cycle through flight technique positions holding each for 3-5 seconds
Phase 4: Landing Technique
Landing technique separates measured 20-foot jumps from 21-foot jumps. Proper landing extends measured distance by maximizing foot placement beyond center of mass while preventing backward collapse that costs distance.
Optimal Landing Position and Execution
The goal: land with feet as far forward as possible while maintaining enough balance to prevent falling backward.
Landing Preparation (Final .20 seconds of flight):
- Both legs extend forward from hips, creating maximum reach
- Torso begins controlled forward lean (approximately 20-30 degrees)
- Arms sweep backward then drive forward powerfully
- Heels lead landing, toes pulled upward toward shins
- Eyes focused on landing area ahead of feet
- Core engaged, preparing for impact absorption
Initial Contact:
- Heels contact sand first, 1-2 inches apart
- Legs remain relatively straight (slight knee flexion, approximately 170-175 degrees)
- Torso continues forward lean, following feet into sand
- Arms drive forward and upward violently
- Head and chest drive forward past knees
Post-Contact Follow-Through:
- Knees flex deeply, absorbing impact
- Hips pike sharply, bringing torso down toward legs
- Arms continue forward and upward arc
- Momentum carries athlete forward past footprints
- Fall forward and sideways, NEVER backward
Distance Maximization Strategy:
The official measurement is taken from the nearest break in sand to the front edge of the takeoff board. Landing with feet far forward means nothing if the athlete falls backward, creating a hand or hip impression behind the footprints.
Critical coaching point: “Feet forward, then fall forward.” Athletes must understand that landing balance determines measured distance as much as flight trajectory.
Common Landing Errors and Corrections
Error #1: Sitting Back at Landing
- Problem: Athlete lands with upright or backward-leaning torso, hips drop behind feet, creating backward hip impression
- Distance loss: 6-12 inches compared to optimal forward landing
- Correction: Practice landing drills emphasizing aggressive forward torso drive, arm throw forward, forward roll completion
Error #2: Premature Leg Extension
- Problem: Legs extend forward too early in flight, causing downward trajectory and early sand contact
- Distance loss: 4-8 inches from suboptimal landing angle
- Correction: Delay leg extension until final .15-.20 seconds of flight, maintain flight technique longer into descent
Error #3: Feet Too Wide at Landing
- Problem: Landing with feet wider than shoulder-width apart creates lateral instability
- Distance loss: 2-6 inches from inability to drive forward cleanly
- Correction: Practice landing with feet hip-width apart (4-8 inches separation), emphasizing parallel foot position
Error #4: Locked Knees at Impact
- Problem: Straight, rigid legs at sand contact create jarring impact, often causing backward fall
- Distance loss: 6-10 inches plus increased injury risk
- Correction: Allow slight knee flexion (170-175 degrees) at contact, then flex deeply through impact absorption
Landing Development Drills
Drill: Elevated Landing Practice
- Jump from 12-18 inch platform into sand pit
- Focus exclusively on landing position and forward fall
- Complete 8-10 repetitions per session
- Emphasize arm drive forward and torso pike
- Film from side angle to analyze landing mechanics
Drill: Standing Long Jump with Emphasis on Landing
- Execute standing long jump from ground level
- Maximal focus on feet-forward, fall-forward pattern
- 10-12 repetitions per session
- Measure to verify landing doesn’t cost distance
- Progress to short approach jumps maintaining landing focus

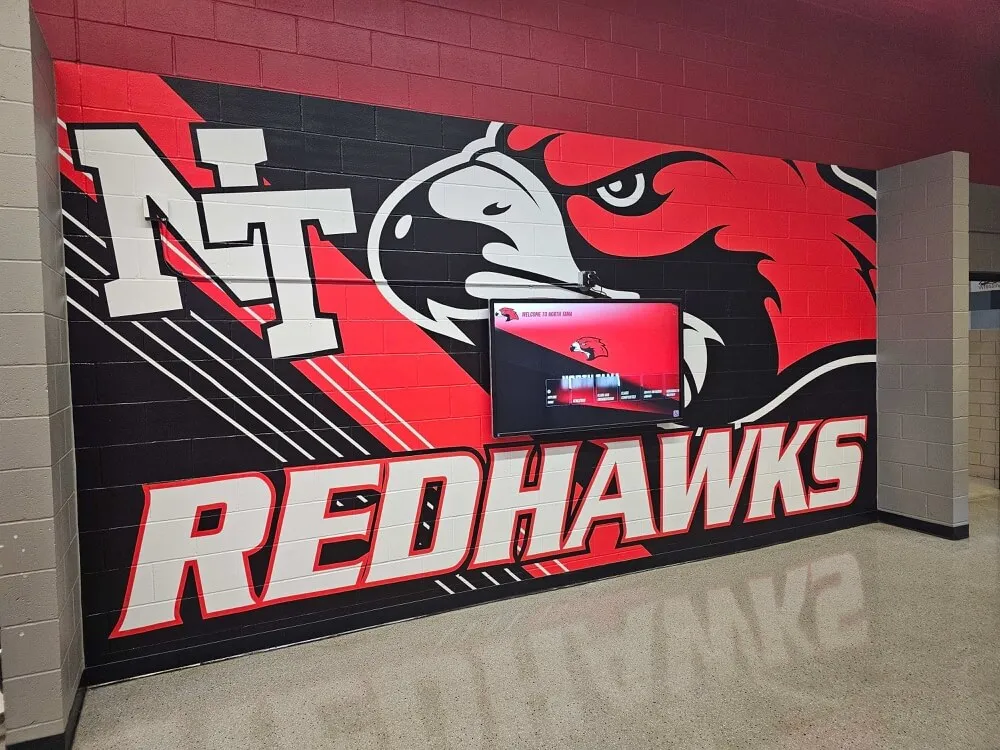
Track and field programs display long jump records and seasonal achievements through [digital athletics displays](https://touchscreenwebsite.com/blog/touchscreen-tv-athletic-information-high-schools-guide/?utm_source=organic&utm_medium=seo-auto&utm_content=digitaltrophycase&utm_campaign=long-jump-technique&utm_term=seo), creating ongoing recognition for technical excellence and distance milestones
Progressive Long Jump Training Program
Systematic technical development follows a progression from isolated phase work to full-approach integration.
Weekly Training Structure for High School Athletes
Monday: Speed and Approach Work
- Warm-up: Dynamic flexibility, sprint mechanics drills (15 minutes)
- Approach run practice: 8-10 full approaches with check mark validation (no jumping)
- Block starts and acceleration: 6 x 30-meter sprints from blocks
- Cool-down and static stretching (10 minutes)
Tuesday: Takeoff and Short Approach Technique
- Warm-up: Jumping-specific preparation (15 minutes)
- Penultimate step drills: 8-10 repetitions focusing on loading mechanics
- Short approach jumps (6-8 strides): 10-12 jumps emphasizing takeoff technique
- Single-leg plyometric work: Box jumps, bounding exercises (20 minutes)
- Core strength training (15 minutes)
Wednesday: Recovery and Film Study
- Light jogging and mobility work (20 minutes)
- Video analysis of previous practice jumps
- Identify one technical focus area for remainder of week
- Optional: Pool recovery work or cross-training
Thursday: Full Approach Integration
- Warm-up: Full dynamic preparation (20 minutes)
- Full approach jumps: 6-8 competition-style jumps from full approach
- Flight technique emphasis (based on athlete’s chosen style)
- Landing drills and practice (15 minutes)
- Lower body strength training: Squats, Romanian deadlifts, single-leg work (30 minutes)
Friday: Competition Preparation or Recovery
- Competition week: Light approach runs, visualization, pre-meet preparation
- Non-competition week: 4-6 moderate-intensity jumps from full approach
- Focus on rhythm and confidence rather than maximum effort
- Optional speed maintenance work (20 minutes)
Saturday: Competition or Assessment
- Competition: Execute race plan, apply weekly technical focus
- Practice week: Full approach jumps measuring and recording all distances
- Track technical execution metrics alongside distance results
Sunday: Complete Rest
- No structured training
- Optional: Walking, light swimming, mobility work if desired
Seasonal Progression Model
Pre-Season (8-10 weeks)
- Emphasis: Building approach speed through sprint training
- Volume: 60-80 total jumps per week (mostly short approach, technique focus)
- Intensity: 70-80% of maximum effort
- Strength focus: Hypertrophy and general strength foundation
Early Season (4-6 weeks)
- Emphasis: Integrating full approach, refining takeoff mechanics
- Volume: 40-60 total jumps per week (increasing full approach percentage)
- Intensity: 80-90% of maximum effort
- Strength focus: Transitioning to power development, plyometric emphasis
Mid-Season (6-8 weeks)
- Emphasis: Competition execution, maintaining technique under pressure
- Volume: 25-40 total jumps per week (primarily full approach, competition simulation)
- Intensity: 90-95% of maximum effort in practice, 100% in competition
- Strength focus: Power maintenance, injury prevention
Championship Season (3-4 weeks)
- Emphasis: Peak performance, technical refinement of one specific element
- Volume: 15-25 total jumps per week (quality over quantity)
- Intensity: 95-100% effort
- Strength focus: Maintenance only, reduced volume to prevent fatigue
Measuring Progress and Setting Performance Goals
Effective long jump development requires tracking both outcome metrics (distance) and process metrics (technical execution).
Performance Benchmarks by Age and Gender
High School Men:
- Beginner/Freshman: 15-17 feet
- Intermediate/Sophomore-Junior: 18-20 feet
- Advanced/Senior: 20-22 feet
- Elite/State Championship level: 22-24 feet
- National championship level: 24+ feet
High School Women:
- Beginner/Freshman: 12-14 feet
- Intermediate/Sophomore-Junior: 15-17 feet
- Advanced/Senior: 17-19 feet
- Elite/State Championship level: 19-21 feet
- National championship level: 21+ feet
College Men (NCAA Division I):
- Participant level: 21-23 feet
- Scoring level (conference): 23-25 feet
- All-conference: 25-26 feet
- NCAA Championship qualifier: 26+ feet
College Women (NCAA Division I):
- Participant level: 17-19 feet
- Scoring level (conference): 19-21 feet
- All-conference: 21-22 feet
- NCAA Championship qualifier: 22+ feet
Technical Assessment Metrics
Distance alone doesn’t reveal whether an athlete is maximizing their potential. Track these process metrics to identify technical limitations:
Approach Consistency:
- Board contact variance: Elite athletes hit within 2 inches of optimal, 90%+ of approaches
- Check mark accuracy: Passing midpoint check within 1 inch, 85%+ of approaches
- Approach velocity: Measured via timing gates at 10 meters before board
Takeoff Effectiveness:
- Takeoff angle: Measured via video analysis (18-22 degree optimal range)
- Vertical velocity: Calculated from flight time (aim for 3.0+ m/s for advanced athletes)
- Ground contact time: .12-.15 seconds for optimal impulse application
Landing Efficiency:
- Landing reach: Distance from estimated center of mass to heel contact (aim for 24+ inches)
- Forward fall completion: Percentage of jumps with forward exit vs. backward fall
- Measured distance vs. calculated trajectory distance: Identifies landing-phase distance loss
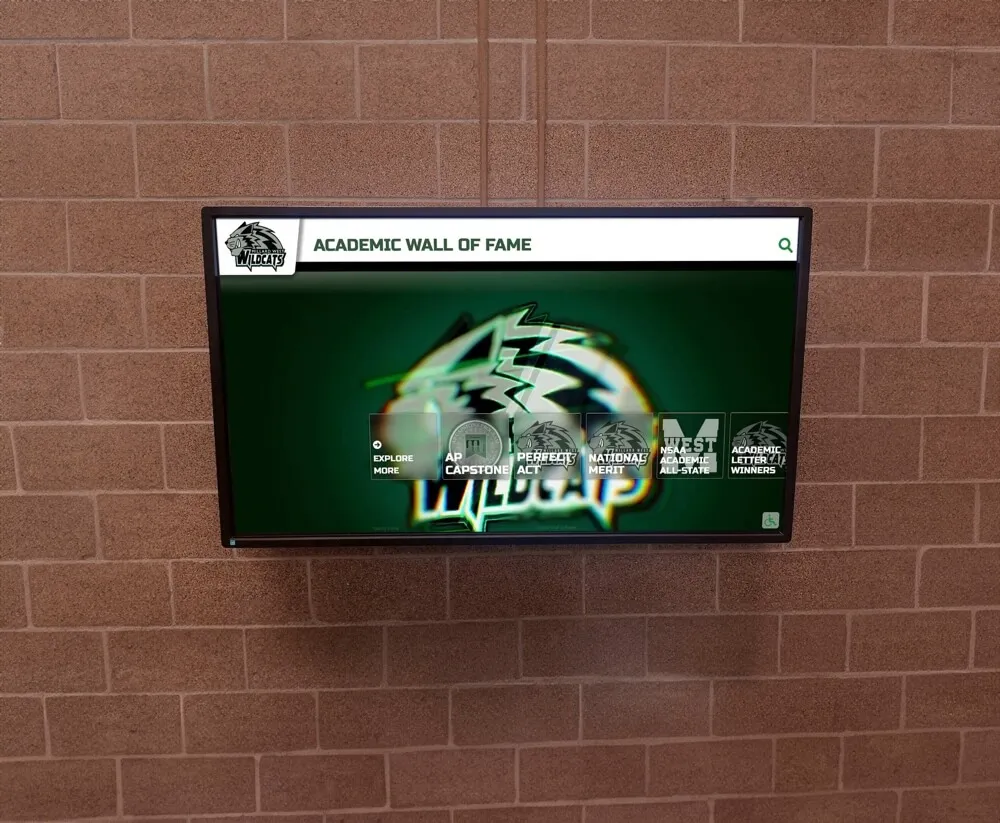
Many competitive programs now use digital recognition platforms to showcase both competition results and technical improvement metrics, creating motivation for athletes to focus on process development rather than outcome obsession.
Common Technical Problems and Solutions
Even experienced jumpers develop technical flaws that limit distance. Systematic diagnosis and correction separate plateau from continued improvement.
Problem: Inconsistent Board Contact
Symptoms:
- Frequent scratches or significantly adjusted final strides
- Distance variation of 2+ feet between jumps from same session
- Visible deceleration or chopping steps in final strides
Diagnosis:
- Film 8-10 full approaches from side angle
- Identify where approach rhythm breaks down
- Check for premature visual acquisition of board (looking down too early)
- Verify starting mark and check marks are clearly defined and used consistently
Solutions:
- Re-establish approach marks through repetition validation
- Practice approach runs without jumping to isolate rhythm issues
- Use visual cues (coach standing at check mark) rather than ground marks initially
- Consider shortening approach by 2 strides if consistency doesn’t improve
- Add midpoint check mark if using only starting and final check marks
Problem: Loss of Horizontal Velocity at Takeoff
Symptoms:
- Approach speed feels fast but jump distance doesn’t reflect it
- Excessive vertical height but limited horizontal distance
- Visible sitting back or reaching for board in final stride
Diagnosis:
- Compare approach velocity (measured 10 meters before board) to board contact velocity
- Analyze penultimate step for excessive lowering (more than 4-5 inches)
- Check final stride length—should be slightly shorter than penultimate, not dramatically reduced
- Review takeoff foot contact position relative to center of mass
Solutions:
- Practice penultimate step in isolation, ensuring subtle lowering without excessive sitting
- Film takeoff from side angle, verify foot plants under or slightly ahead of center of mass (not reaching)
- Execute pop-up drills: short approach with focus on maintaining horizontal velocity through takeoff
- Strengthen takeoff leg through single-leg plyometrics and Olympic lifting variations
- Mental cue: “Sprint through the board” rather than “jump from the board”
Problem: Forward Rotation During Flight
Symptoms:
- Torso rotates forward during flight, feet lag behind body
- Landing with torso already bent forward, unable to extend feet forward effectively
- Sensation of being thrown forward rather than lifting upward
Diagnosis:
- Review takeoff position: forward torso lean at takeoff causes forward rotation
- Analyze free leg drive: insufficient knee lift at takeoff contributes to rotation
- Check arm action: asymmetrical or weak arm drive affects rotation control
Solutions:
- Practice takeoff drills emphasizing upright torso position and tall hip extension
- Cue aggressive free leg drive: “knee to chest” at takeoff
- Strengthen core to resist forward rotation forces
- Select appropriate flight technique: hang or hitch-kick combat rotation better than sail
- Video feedback: athletes often don’t perceive forward lean until seeing film
Problem: Inadequate Landing Distance
Symptoms:
- Flight trajectory appears good but measured distance shorter than expected
- Falling backward at landing or hips dropping behind feet
- Premature leg extension causing early sand contact
Diagnosis:
- Measure flight trajectory versus actual landing distance to quantify loss
- Film landing from side angle identifying exact moment of distance loss
- Check timing of leg extension—should occur in final .15-.20 seconds of flight
Solutions:
- Elevated landing drills emphasizing forward fall pattern
- Strengthen hip flexors for powerful forward pike at landing
- Practice arm throw timing: backward sweep during descent, explosive forward drive at contact
- Mental cue: “Feet forward, fall forward—never fall back”
- Standing long jump practice with landing emphasis before progressing to full jumps
Integration with Overall Track and Field Training
Long jump doesn’t exist in isolation—it integrates with broader sprint and power development within track and field programs.
Sprint Training Carryover
Long jumpers benefit immensely from structured sprint training developing the horizontal velocity essential for jump distance:
- 100-meter training: Builds maximum velocity and sprint endurance
- 60-meter training: Develops acceleration matching long jump approach demands
- 30-meter block starts: Creates explosive acceleration patterns
- Flying sprints: Isolates maximum velocity mechanics
- Tempo runs: Maintains aerobic base supporting training volume
Athletes competing in both sprints and long jump must balance training loads carefully—excessive jump volume compromises sprint performance while insufficient jumping limits technical development.
Strength and Power Development
Systematic strength training provides the physical foundation for technical execution:
Lower Body Strength Emphasis:
- Back squat: 1.5-2.0x body weight for high school men, 1.25-1.75x for women
- Single-leg squat variations: Addressing bilateral strength imbalances
- Romanian deadlifts: Developing posterior chain strength critical for approach and takeoff
- Weighted step-ups: Building unilateral leg strength matching takeoff demands
Olympic Lifting for Power:
- Hang clean: 1.0-1.25x body weight for high school athletes
- Power snatch: 0.75-1.0x body weight
- Push jerk: 1.0-1.25x body weight
- These lifts develop rate of force development critical for explosive takeoff
Plyometric Training:
- Depth jumps: Building reactive strength (ground contact under .25 seconds)
- Bounding exercises: Developing horizontal power application
- Box jumps: Single and double-leg variations for takeoff leg strength
- Hurdle hops: Creating rhythm and coordination patterns
Many track programs display strength benchmarks and personal records alongside competition results through interactive athletic displays, helping athletes understand the correlation between weight room development and competitive performance.
Multi-Event Development Considerations
High school athletes often compete in multiple events—long jump, triple jump, sprint hurdles, 4x100 relay. Event selection and training volume require strategic balance:
Compatible Event Combinations:
- Long jump + triple jump: Highly compatible, shared technical foundation
- Long jump + sprint hurdles: Good combination, both require speed and power
- Long jump + 100m/200m: Excellent combination, sprint speed directly benefits jumping
- Long jump + 4x100 relay: Minimal conflict, relay provides sprint training
Training Load Management:
- Limit total weekly jumps across all jumping events to 60-80 during base phase, 40-60 during competition season
- Separate maximum-intensity sprint sessions from maximum-intensity jump sessions by 48+ hours
- Use sprint training to develop approach speed rather than adding separate speed sessions
- Periodize event emphasis: focus on technical development earlier in season, competition execution later
Mental Preparation and Competition Strategy
Technical mastery means nothing if athletes can’t execute under competition pressure. Mental preparation separates consistent competitors from talented practice jumpers.
Pre-Competition Visualization
Effective visualization involves more than imagining a good jump—it requires mentally rehearsing specific technical cues:
48 Hours Before Competition:
- Review film of best technical jumps from recent training
- Identify 2-3 specific technical cues to emphasize (e.g., “tall takeoff,” “rhythmic approach,” “feet forward at landing”)
- Visualize complete jump execution 5-10 times, including approach feel, takeoff sensation, flight position, landing
Competition Day Warm-Up:
- Execute mental rehearsal of competition jumps during dynamic warm-up
- Practice approach runs without jumping, reinforcing rhythm and board contact
- Take 2-4 short approach jumps (6-8 strides) focusing on specific technical cues
- Final visualization immediately before first jump: see, feel, and hear the complete successful execution
Managing Competition Round Strategy
Most high school competitions provide three preliminary jumps with top 8-9 athletes advancing to three additional final-round jumps. College competitions typically offer four or six total jumps with similar advancement structures.
Round 1-2 Strategy (High School):
- Goal: Record a safe, consistent mark ensuring finals qualification
- Approach: 95% effort focusing on technical execution rather than maximum distance
- Mental framework: “Hit the board, execute technique, establish a mark”
- Avoid: Excessive caution that compromises approach speed and distance potential
Round 3 Strategy:
- Goal: Improve initial mark if possible, but primarily protect qualification position
- Approach: If comfortably qualified, take calculated risk for improvement; if on bubble, ensure safe jump
- Mental framework: Assess competition field, understand qualification cutoff
Finals Rounds (4-6):
- Goal: Maximum distance, appropriate risk-taking for medal positions
- Approach: 100% effort, execute optimal technique under pressure
- Mental framework: “This is what I trained for—trust my technique and compete”
- Strategy adaptation: If leading, maintain consistency; if chasing, take technical risks for distance improvement
Athletes performing under pressure benefit from recognition systems celebrating competitive achievement alongside training metrics, building confidence through documented improvement over multiple seasons.
Injury Prevention for Long Jumpers
The repetitive high-impact nature of long jump creates specific injury risks requiring proactive prevention strategies.
Common Long Jump Injuries
Patellar Tendinopathy (Jumper’s Knee)
- Cause: Repetitive eccentric loading during takeoff and landing
- Symptoms: Pain at front of knee, particularly during jumping and descending stairs
- Prevention: Progressive loading, eccentric quadriceps strengthening, adequate recovery between jump sessions
- Management: Reduce jump volume, ice after training, consult sports medicine professional for persistent pain
Hamstring Strains
- Cause: Explosive hip extension during sprint approach and takeoff
- Symptoms: Posterior thigh pain, particularly during acceleration or explosive movements
- Prevention: Nordic hamstring curls, Romanian deadlifts, proper warm-up including dynamic stretching
- Management: Immediate cessation of activity, ice, compression, medical evaluation for grade 2-3 strains
Achilles Tendinopathy
- Cause: Repetitive explosive plantarflexion during takeoff push-off
- Symptoms: Posterior ankle pain, morning stiffness, pain during push-off
- Prevention: Calf strengthening (straight and bent knee variations), gradual training load increases
- Management: Relative rest, eccentric heel drop exercises, evaluation by sports medicine professional
Lower Back Pain
- Cause: Repetitive lumbar extension during flight and landing, inadequate core stability
- Symptoms: Lower back discomfort during and after jumping, particularly with flight technique
- Prevention: Core strengthening emphasizing anti-extension exercises, proper landing mechanics
- Management: Core stability work, assess technique for excessive lumbar extension, medical evaluation if persistent
Injury Prevention Program Components
Comprehensive Dynamic Warm-Up (15-20 minutes):
- General cardiovascular preparation: Light jogging 800-1200 meters
- Dynamic flexibility: Leg swings, walking lunges, high knees, butt kicks, A-skips, B-skips
- Jump-specific preparation: Pogos, ankle bounces, straight-leg bounds, alternate-leg bounds
- Progressive sprint build-ups: 3-4 x 40-60 meters at 60%, 70%, 80%, 90% effort
- Neural activation: 2-3 short approach pop-ups before full jumping
Strength Training for Injury Resilience:
- Eccentric hamstring work: Nordic curls, single-leg Romanian deadlifts (2x weekly)
- Quadriceps strengthening: Spanish squats, split squats, terminal knee extensions (2x weekly)
- Calf complex: Bent and straight knee heel raises, eccentric heel drops (2x weekly)
- Core anti-extension: Dead bugs, Pallof press, plank variations (3x weekly)
- Hip stability: Single-leg balance, lateral band walks, clamshells (3x weekly)
Recovery and Load Management:
- Limit total weekly jumps based on training phase and competition schedule
- Separate maximum-intensity jump sessions by 48-72 hours
- Monitor fatigue indicators: subjective soreness ratings, approach speed degradation, technical breakdown
- Implement deload weeks: reduce jump volume by 40-50% every 3-4 weeks during intensive training phases
- Prioritize sleep (8-9 hours nightly) and nutrition supporting recovery demands
Long-Term Athletic Development in Long Jump
Elite long jump performance requires 6-10 years of systematic development from introduction to peak performance. Understanding this timeline prevents burnout and inappropriate early specialization.
Age-Appropriate Progression Model
Ages 12-14 (Early Adolescence):
- Emphasis: General athleticism, sprint mechanics, fundamental jumping patterns
- Technical focus: Short approach jumping (8-12 strides), basic hang technique, consistent board contact
- Training volume: 40-60 total jumps weekly during track season, no year-round specialization
- Competition: Participate for experience and enjoyment, not outcome focus
- Strength work: Body weight exercises, basic movement patterns, no maximal lifting
Ages 15-16 (Mid-Adolescence):
- Emphasis: Approach length extension, sprint speed development, introduction to advanced flight techniques
- Technical focus: Full approach development (14-18 strides), sail or hitch-kick introduction, takeoff refinement
- Training volume: 50-70 total jumps weekly during competitive season
- Competition: Conference and regional championship focus, establishing competitive experience
- Strength work: Introduction to Olympic lifting, progressive resistance training, continued body weight emphasis
Ages 17-18 (Late Adolescence):
- Emphasis: Technical refinement, maximum velocity development, competition execution
- Technical focus: Optimization of all four phases, hitch-kick mastery for advanced athletes, landing maximization
- Training volume: 40-60 jumps weekly during championship season, periodized throughout year
- Competition: State and national championship pursuit, beginning college recruitment process
- Strength work: Systematic periodization, Olympic lifting emphasis, power development focus
Ages 19-22 (Collegiate Development):
- Emphasis: Peak performance development, consistent execution under pressure, physical maturation
- Technical focus: Refinement rather than wholesale changes, addressing specific limiting factors
- Training volume: Sophisticated periodization with 30-50 jumps weekly during competition phases
- Competition: Conference championships, NCAA regional and national meets, potential international junior competition
- Strength work: Advanced periodization, maintenance of power while managing training load
Ages 23+ (Post-Collegiate/Elite):
- Emphasis: Sustained peak performance, injury prevention, competitive longevity
- Technical focus: Minor adjustments, consistency under championship pressure
- Training volume: Reduced volume (20-40 jumps weekly), increased intensity and quality
- Competition: National championships, international competition, Olympic development
- Strength work: Maintenance focus, injury prevention emphasis
Programs tracking athletic achievements across multiple years help athletes visualize long-term progression, understanding that sustainable development occurs over seasons and years rather than weeks and months.
Conclusion
Mastering long jump technique requires systematic development of four interconnected phases—approach run, takeoff, flight, and landing—each contributing essential elements to maximum distance performance. High school and college athletes who commit to phase-specific technical development while building the speed, power, and strength foundation necessary for execution consistently exceed the performance of more naturally athletic competitors lacking technical precision.
The approach run establishes controlled horizontal velocity through progressive acceleration and consistent board contact. The takeoff converts horizontal momentum into vertical lift through explosive triple extension and proper body positioning. Flight technique maintains balance and optimizes trajectory, preventing distance loss from poor air position. Landing mechanics maximize measured distance by extending feet forward while completing forward fall patterns.
Progress in long jump emerges from deliberate practice emphasizing quality repetitions with technical focus over high-volume jumping without clear objectives. Athletes working with knowledgeable coaches, tracking both outcome and process metrics, and committing to multi-year development timelines transform fundamental jumping ability into consistent 20+ foot performances at the high school level and 22+ feet for college athletes.
Modern track and field programs increasingly use digital recognition platforms showcasing long jump achievements, personal records, and historical program benchmarks alongside traditional recognition methods. These systems create ongoing motivation for technical development while celebrating the measurable improvement that defines successful long jump training.
Whether you’re a coach implementing systematic long jump training, an athlete pursuing conference championships, or an athletic director building program infrastructure supporting track and field excellence, understanding that technical mastery determines distance outcomes as much as raw athletic ability provides the foundation for sustainable competitive success.